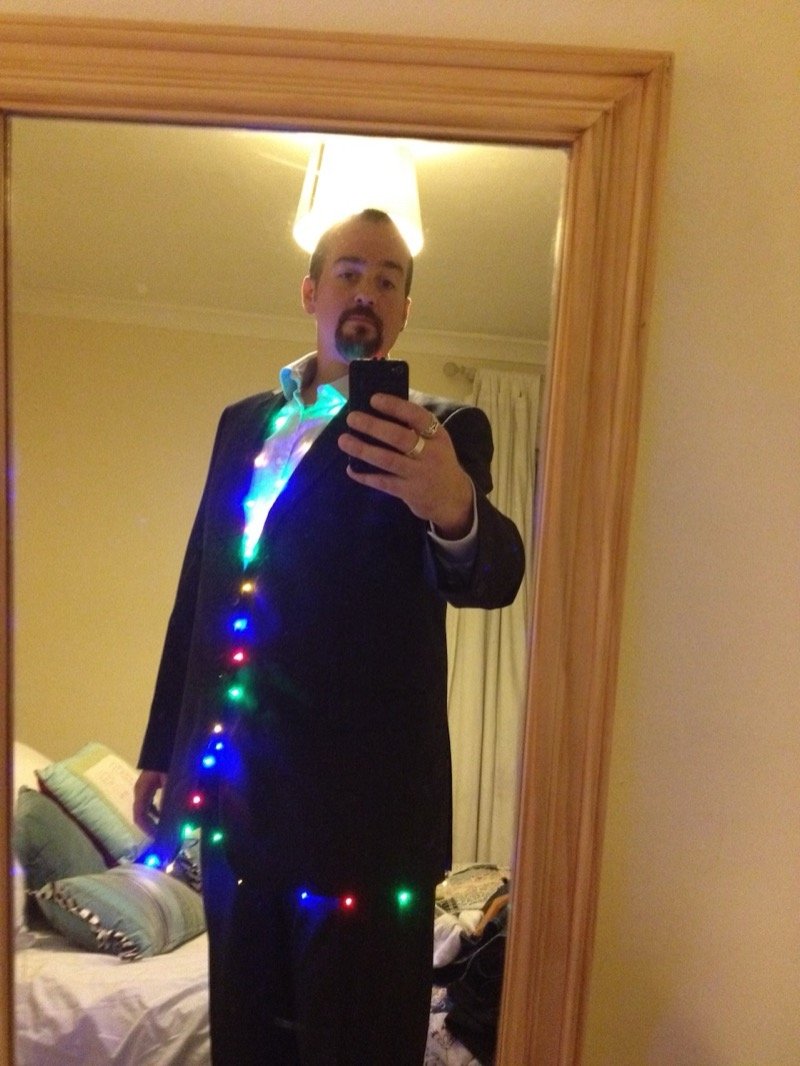
This is me after loosely sewing 40 battery-powered LED lights to the inner lining edge of my suit jacket for the work Christmas dinner party. A couple of years ago I grabbed some 2AA-powered LED lights from IKEA (they don’t seem to sell them anymore, though) and loosely strung them over my shirt and under my suit jacket, battery packs in my trouser pockets, in order to look festive. Or suspicious. Depending on the lighting.
This year, I didn’t want to do the exact same thing — and also wanted to streamline the entire process a little. So meet the LED Jacket MK II. The LED lights are from Marks & Spencer (so’s the suit, but I already had that) and only cost £5 each. They also appear to be missing from the M&S website, causing me to believe there’s some conspiracy against selling LED lights online.
But I digress.
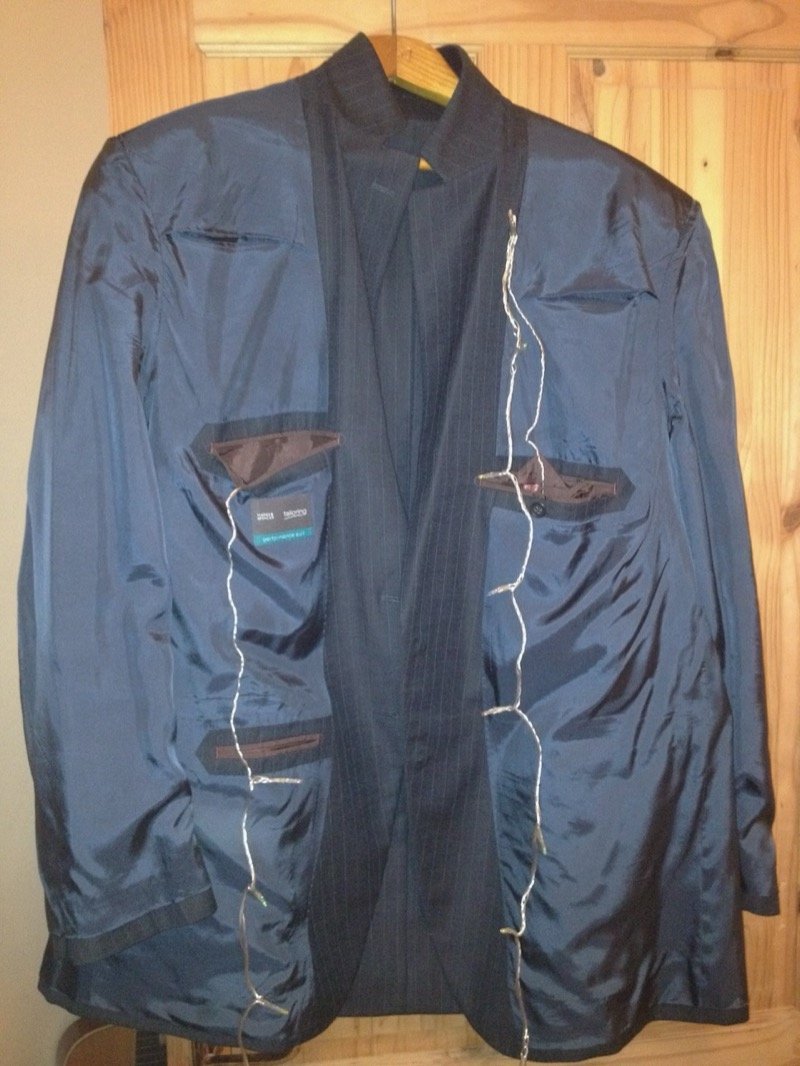
The strings are made of 20 coloured lights, each powered by 3 AA batteries. I didn’t want the battery packs in my trouser pockets again, so I started by positioning them in the inner jacket pocket.
Operating the LEDs is done via a small switch on the outside of the battery casing. I made sure this was facing outward, so I could activate the lights by touching the front of the jacket. Thankfully, the inner pockets are below nipple level. Unfortunately, you miss out on a few double entendres about the jacket being a “turn on.” Wakka wakka wakka.
I bought 50 small brass safety pins to attach the lights to the inside of the jacket. This didn’t work as well as I’d thought. To get it working properly, the pin needs to be attached as close as possible to the LED to stop it moving around — but just clipping it to the wires nearest the LED wasn’t sufficient. I wanted the LEDs peeking out from the inner edge and as stable as possible.
Around each LED is a thin plastic sheath protecting the wires and resistor. I was able to get a needle and thread through without damaging any wiring, so each LED was loosely stitched into place — nothing too serious, they need to be easily removed afterward and I wasn’t about to sacrifice the jacket — with the pins used further inward as cable management. I attached the first and last LEDs on each string, then marked out halfway points by sight. The process was more time-consuming than I’d imagined, taking up the entire runtime of Friends With Benefits and half of Captain America.
All in all, a success — though I’d like to improve on it in a couple of ways.
One would be some kind of dimmer switch. The overhead lights in the bar were pretty close to off, so the jacket was perhaps a little overwhelming. Being able to raise and lower the intensity would be a significant quality-of-life improvement for everyone in the immediate vicinity.
Another thing: some kind of fabric over the cables inside the jacket, so it doesn’t look like I might possibly have explosives inside my coat — judging by all the visible wiring and the reaction of the nervy little guy across from me on public transport last night.
I’m pretty sure most terrorists aren’t this festive.

Total cost: £10 on lights, £1.50 for the safety pins, about 3 hours prep time.